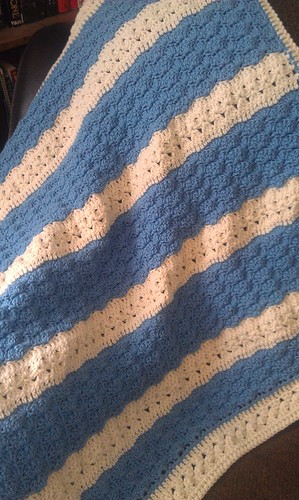
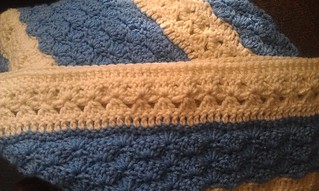
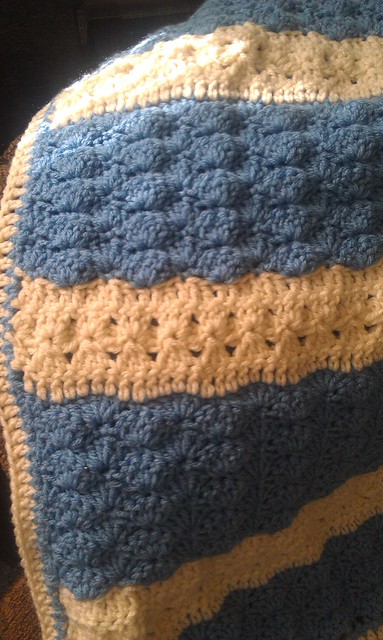
There are times when I can see a finished project in my mind AND the stitch process goes together smoothly enough that I can get one done in a week! Which is what has happened here!

Please read this pattern in it's entirety. There are many places with a note to give additional instructions.
Every crafter's work can vary so if you miss a stitch or end up with too many on a row in order to keep
the pattern, simply add a double crochet to fill in the “gap” and mind it when you do your next row.
Special Stitches
2dc-cluster (uses one ch): YO, insert hook into 3rd ch, YO and pull up loop, YO and draw through 2
loops on hook; repeat once more then draw through all 3 loops on hook.
3dc-cluster (uses next 3 dc): YO, insert hook into next dc, YO and pull up loop, YO and draw through 2
loops on hook, repeat 2 more times using next 2 dc then draw through all 4 loops on hook. (3dctog)
Materials:
Hook: 5mm/H8
Yarn: Worsted Weight 4/Medium
Amount: 9 oz cream/off-white
15 oz blue
My finished size: 36” x 34”
Pattern:
Ch 121
Row 1: sc in 2nd ch from hook, sk 2 ch, 5 dc in next ch, sk 2 ch, sc in next ch, *sk 2 ch, 5 dc in next ch,
sk 2 ch, sc in next ch- repeat from * to end; sc in last st
Row 2: ch 3, 2 dc in 1st st, sk 2 dc, sc in next dc (mid shell), sk 2 dc, 5 dc in sc, *sk next 2 dc, sc in next
dc, sk 2 dc, 5 dc in next sc- repeat from * to last sc; 3 dc in last sc
Row 3: ch 1, sc in 1st dc, sk 2 dc, 5 dc in next sc, sk 2 dc, sc in next dc, *sk 2 dc, 5 dc in next sc, sk 2
dc, sc in next dc- repeat from * to end; sc in top of last dc
Row 4: Repeat row 2
Row 5: Repeat row 3
Row 6: Repeat row 2
Change color using sl st into last st
Row 7: ch 3, dc in next dc & across. Note- no dc in turning ch, be sure number of dc is divisible by 3.
Individual results can vary.
Row 8: ch 2, dc in 1st dc, ch 3, work 2dc-cluster into the 3rd ch on the ch-3 you just made, *work 3dccluster, ch 3, work 2dc-cluster, repeat from * across to last 2 dc; sk next dc and work 2dc-cluster using
last dc.
Row 9: ch 3, 2dc-cluster in same st, *move to next 3dc-cluster and work a 3dc shell (3dc in one stitch),
repeat from * to end; 2 dc in turning ch
Row 10: ch 3, dc in same st, dc in each st across, 2 dc in turning ch
Change color using sl st in last st
Row 11: ch 1, sc in next dc, *sk 2 dc, 5 dc in next dc, sk 2 dc, sc in next dc, repeat from * to last 3 dcsk 2 dc, 3 dc shell in last dc. Note: leave turning ch unworked
Row 12: ch 1, sc in 1st dc, *sk 2 dc, 5 dc in next sc, sk 2 dc, sc in next dc(mid shell), repeat from *
across to last sc- 3 dc shell in last sc

Rows 13 through 20: Repeat row 12
!!
----------
Change color using sl st in last st
Row 21: Repeat Row 7
Row 22: Repeat Row 8
Row 23: Repeat Row 9
Row 24: Repeat Row 10
Change Color using sl st in last st
Row 25: Repeat Row 11
Rows 26-35: Repeat Row 12
!!----------
The area above between the !!-------- symbols is what you will repeat throughout the blanket until
desired length. If buying more yarn for a longer blanket than the pattern I have here, buy more blue
than off-white.
Borders: First, sc all the way around to create an even foundation. For the ends, I repeated the stitch
pattern of Rows 7 through 10. The sides are just a single row of dc. Count your stitches and make
changes where necessary to be divisible by 3 for the pattern.

Please note: I have not done this pattern in over 5 years so I likely cannot offer much support for it.

No comments:
Post a Comment